
Type your question
Business&Marketplace
Users of the Pro Edition of BushTripInjector can define here several facts for the Ingame Marketplace.
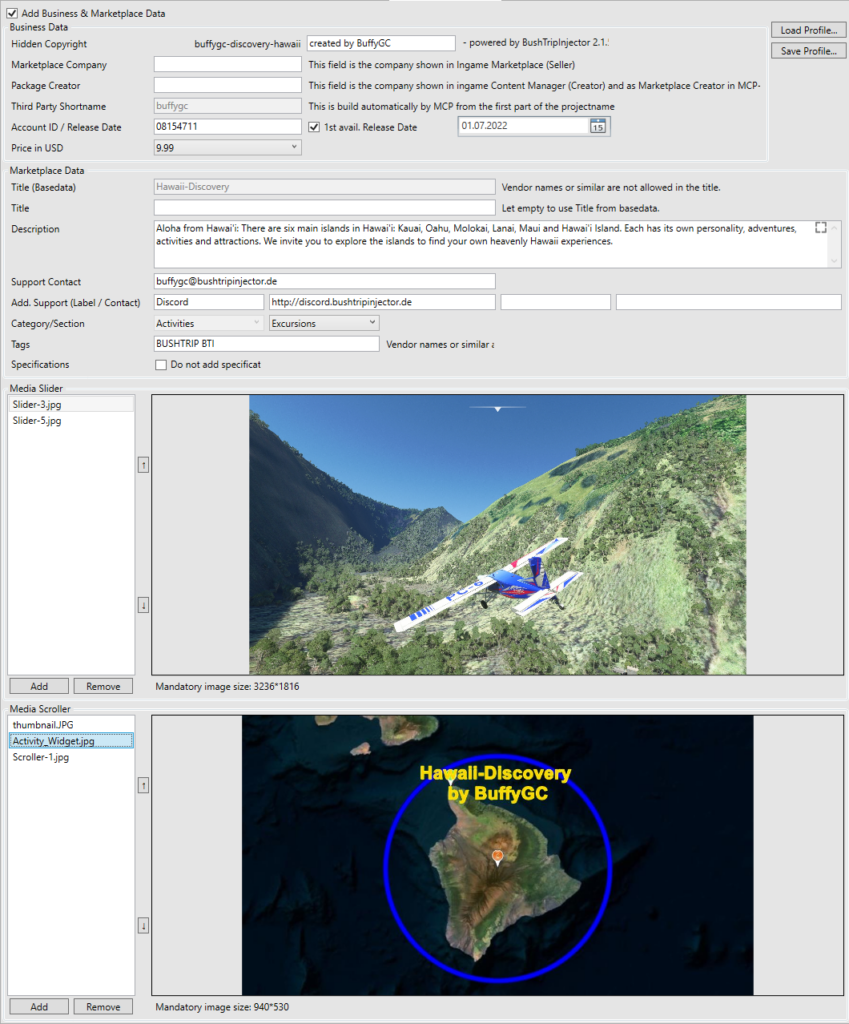
| Hidden Copyright | The copyright text is included in several files of your mission. Visible and invisible. Just add your company name or nickname to complete the sentence. |
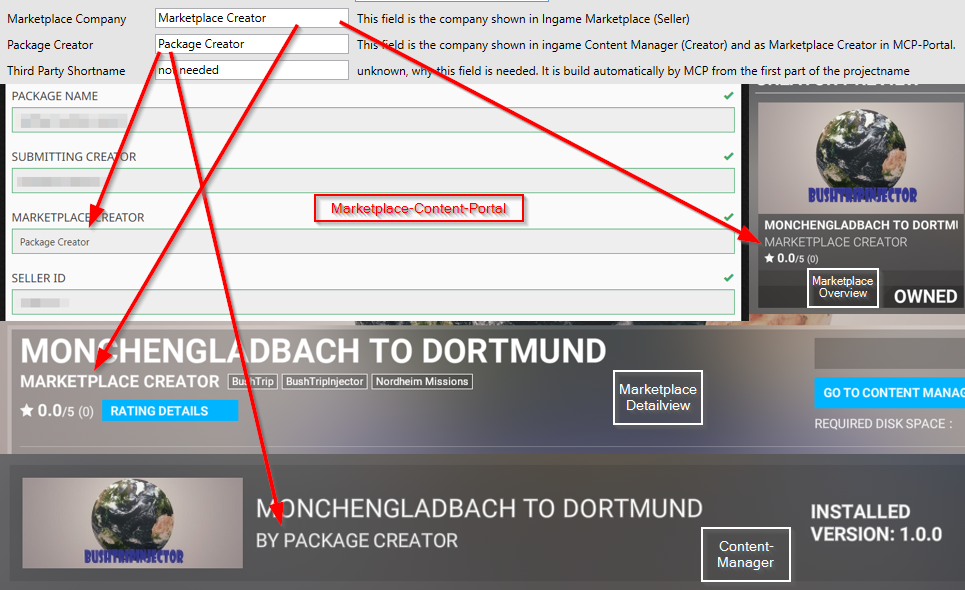
| Marketplace Company | This field is the company shown in Ingame Marketplace (Seller). See also the image below this table. |
| Package Creator | This field is the company shown in ingame Content Manager (Creator) and as Marketplace Creator in MCP-Portal. See also the image below this table. |
| Third Party Shortname | This is build automatically by MCP from the first part of the projectname |
| Account Seller ID | Here you should input the seller ID that you have been assigned by Microsoft when you completed the Partner process. |
| Release Date | This box, when checked, will publish the asset on the first available release date after it has been validated. If you un-check this option, then you can supply a planned release date for the asset. The asset will not be published until the date given, assuming that it passes validation. If the date specified has passed when the validation process is finished, then the add-on will be published on the next available release date. |
| Price in USD | This is the price (in US dollars) of the add-on on the Marketplace. This can be free ($0.00) or can be between $4.99 and $149.99. Price is input without the „$“ sign, and must be in increments of $0.50 between the values of $4.99 and $99.99 (EG: you can’t have $10.25, it has to be either $9.99 or $10.49), and in increments of $1.00 if above $99.99 (EG: you can’t have $125.49, it would have to be either $124.99 or $125.99). |
| Description | This is the main description of the package and will be used for marketing. The text can use MarkDown, which enables you to easily add some basic formatting to it (like bullet points, bold text, etc…), and the field has a character limit of 4000 characters. |
| Support Contact | Here you should add in either an email address or a full web page URL as a point of contact for any support issues with the add-on. Once you add this information, you may also supply additional support contacts (see below for details). |
| Additional Support Contact | The Business & Marketplace tab permits you add in up to two optional additional support contacts for every add-on package. For example, the main contact could be for bug reporting, but you may want to have an additional contact for „marketing“ or simply „feedback“, etc… This section permits you to add a custom Label for the contact type and then supply a Link, which can be an email or a full URL. |
| Category Section | Chose the category and section where your product should be place in the ingame marketplace. When you are publishing bundles of type „Pack“ or „Bundle“, you can chose up to 3 category/sections. |
| Media Slider | This adds a slider block to the Marketplace that permits you to add various large images that the user can slide between. Media images should be authored as 3236px * 1816px JPG or GIF. Media Slider images must be unique and it is not allowed to have the same image as a Marketplace-Hires Image or a Media Scroller Image. |
| Media Scroller | This adds a scroller block to the Marketplace that permits you to add various small images that the user can scroll, Media Scroller images should be authored as 940px * 530px JPG or GIF. Media Scroller images must be unique and it is not allowed to have the same image as a Marketplace-Hires Image or a Media Scroller Image. |
Preview The Marketplace Data
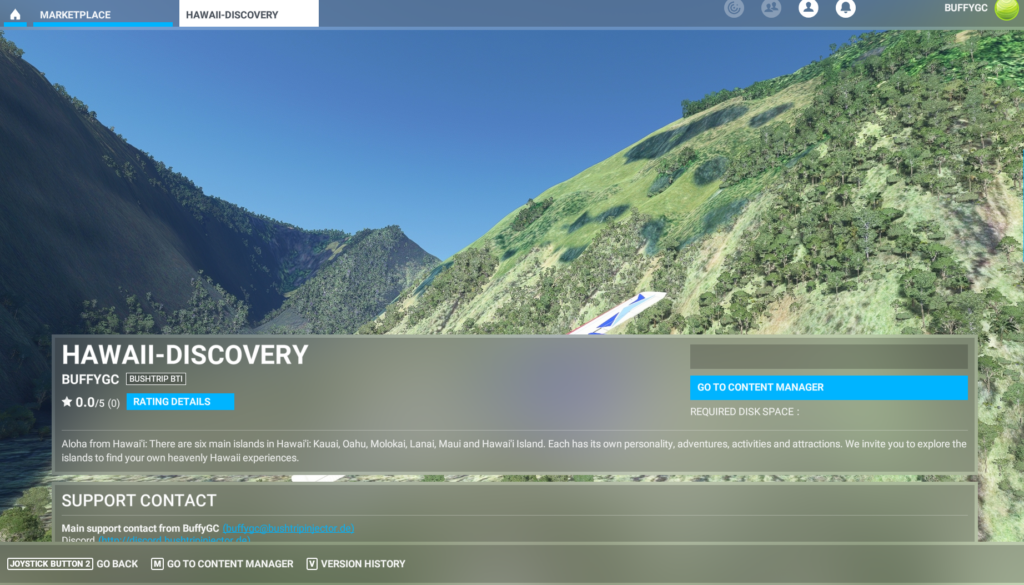
Once you have added the Marketplace data to the package you’ll want to preview it in the simulation. Generate the mission.
Start MSFS and open the Marketplace. Select the „Creators“ Section in the top row. In Developer Mode Menu, open the project. Select the top level Xml-File from the mission folder (the Xml of the same folder as the ‚GeneratorInfo.txt‘).
You can preview how it’ll look on the Marketplace by going to the Marketplace section of the Microsoft Flight Simulator UI, and it should be shown just like any other item.